Japanese-Spiced Roasted Beets + Parsnips

Japanese Spice Roasted Beets + Parsnips by Keely Marie


This is officially the first time I’ve cooked beets at home and I am slowly beginning to enjoy them. {Wasn’t a fan previously} Amber Antonelli’s Beet Hummus recipe turned me onto them half of the way. These beets took me 3/4 the way there. Thanks for the recipe choice this week Sandra.

I need one final WINNER of a beet recipe and I just might say I like beets. MIGHT.

Also, totally random… I believe I now know where the saying “Beet Red” came from after cooking this recipe. WHAT did you say? You mean it’s not “BEAT red,” like you beat someone up!? Please tell me this makes sense to you. I actually had that silly aha moment alone with my glass of wine in the kitchen, hands bright red from peeling the beets.

japanesespicebeets-2

This recipe is sweet with the honey walnuts and a “spicy” from the black pepper and chili powder, my favorite flavor combo. I only used half of the spice mix the recipe called for, seemed overkill to use more as it is pretty strong.

What is your favorite beet recipe? Do you have THE ONE to make me a full beet lover?  I want to know!


Japanese-Spiced Roasted Beets + Parsnips

Prep Time: 5 minutes

Cook Time: 1 hour

Serving Size: 4

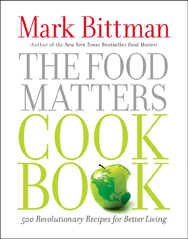
adapted from the food Matters Project Cookbook by Mark Bittman

Ingredients

  1. 1 tablespoon vegetable oil, plus more for greasing the pan
  2. 1 1lb beets (about 2 large), peeled and cut into wedges
  3. 3-4 parsnips, peeled and chopped into wedges
  4. 1 teaspoon garlic powder
  5. 1 tablespoon sesame oil
  6. 1 tablespoon black peppercorns
  7. 2 teaspoons white sesame seeds
  8. 1 tablespoon grated orange zest
  9. 1 tablespoon chili powder
  10. 1/2 teaspoon poppy seeds
  11. Salt
  12. 1/2 cup sliced scallions
  13. 1/2 cup chopped walnuts
  14. 2 tablespoons honey

Instructions

Heat the oven to 400°F. Grease a large roasting pan with oil. Place the beets in the pan, drizzle with the 1 tablespoon vegetable oil and the sesame oil, and toss to coat. Sprinkle with garlic powder and a pinch of salt.

Roast, undisturbed, for 20 minutes. Check on them and add oil if they are sticking to the pan. Continue roasting, turning every 10 minutes or so, until crisp on the outside and just tender inside, another 20 to 30 minutes.

While the beets are roasting, mix 1/3 cup chopped walnuts with 2 tablespoons honey in a medium bowl. Set aside.

Meanwhile, put the peppercorns and white sesame seeds in a spice or coffee grinder grind to a coarse powder. Transfer to a small bowl and stir in the orange zest, chili powder, and poppy seeds. When the beets are cooked toss them with the half of the spice mixture, a pinch of salt, and the scallions. Then toss in the honeyed walnuts. Return to the oven for a minute or 2 to toast the spices and walnuts. Taste and adjust the seasoning. Keep the leftover seasoning in the fridge and use for meat or other veggies within a day or 2. Serve hot or at room temperature.

https://keelymarie.com/2013/05/14/japanese-spiced-roasted-beets-parsnips/

And check out all the creative beet recipes from the Food Matter Project members here.


japanesespicebeets-3

Served with pan seared pork chops using the same spice mix, minus the orange zest


Like this post? Don’t forget to like my facebook page or subscribe via email for weekly updates and posts!
Follow Me on Facebook

keely marie

Mediterranean Cobb & Champagne Caper Vinaigrette


MediterraneanCobb

As you all may have noticed I have been a little MIA in the MIA. I traveled for work and vacation most of March and have had a few side projects taking up my normal blogging time. Starting this blog 2 years ago opened my eyes to the world of WordPress, Illustrator, Thesis, and all  that comes with blogging. I fell in love with it all and have been spending most of my week nights reading and trying and playing with everything.

So when my very best girlfriend started a jewelry line end of last year, I dove in to create the website and online shop for her. It’s been a really fun (and challenging!) project and I can’t wait to show you the finished product and her elegant jewelry. {We are getting close!}

And I promise to be in this space more often now, I miss it!

As for this Mediterranean Cobb, it was enjoyed with great girlfriends from my college sorority days (Deeeeee Gee!) and it was just as unique as I thought it would be after reading the recipe in The Food Matters Cookbook. Thanks for a great pick Sara!

I served this salad with Seared Scallops with Lemon and White Orzo. Delish! I’ll post that recipe next week.

Mediterranean Cobb Salad & Champagne Caper Vinaigrette

Prep Time: 20 minutes

Serving Size: 4

Ingredients

  1. 1/3 cup high quality Olive Oil
  2. 2 tablespoons white wine vinegar, I used a Champagne Vinegar
  3. 1 ½ Tablespoons capers, with some of their brine
  4. 2 Tablespoons chopped fresh parsley
  5. Fresh cracked black pepper
  6. 8 cups lettuce, I used half Romaine half and baby spinach
  7. 1 cup canned chickpeas, drained
  8. ½ cup chopped sun dried tomatoes
  9. 1 small jar (about ¼ cup chopped) artichoke hearts
  10. 1 small or half large red onion, sliced thinly
  11. 1 cup hard boiled eggs, chopped (with or without yolks, your preference)
  12. 1/3 cup feta cheese, crumbled

Instructions

In a blender, combine the oil, capers, vinegar, parsley, and black pepper. No salt is needed because of the saltiness and flavor of the capers.

Turn the blender on low for 30 seconds to create a creamy emulsion. Taste and add more pepper or vinegar if needed.

In a large bowl mix together the two types of greens. Top with the chickpeas, sun dried tomatoes, artichoke hearts, onion, egg, and feta. For a traditional cobb serve with each ingredient in a large bunch on top of the lettuce. I chose to sprinkle it all over in layers.

Once you are ready to serve pour the dressing over the salad and toss, then serve. If you have any leftover ingredients you could serve those as add-on toppings on the side.

Notes

Adapted from the food Matters Cookbook by Mark Bittman, pg 149

https://keelymarie.com/2013/04/25/mediterranean-cobb-salad-champagne-caper-vinaigrette/


Head here to see the Cobbs the other FMP members dreamed up this week.


Like this post? Don’t forget to like my facebook page below!

Follow Me on Facebook


::: keelymarie :::


Carrot Parsnip Gnocchi with Sage Brown Butter

CarrotParsnipGnocchi-7887

This last week was intimidating and exciting at the same time. I joined a new gym and started working with a personal trainer. I’m enjoying the guided kick your ass work-outs and I am definitely feelin’ it!  Spending some time on ME has been a long time coming, so it feels good.

I was a little concerned to make gnocchi the same week that I jump into a healthy kick, but these carrot and parsnip gnocchi really didn’t seem that unhealthy since the most prevalent ingredients are the veggies.

The simplicity of this dish completely blew my mind! Just carrot, parsnip, and flour? So many possibilities and the FMP members pulled out all the stops. Our host this week, Joanne whipped her rendition up with Butternut squash instead of carrots.

I chose to add some sweet parsnips and loved how they turned out! This would be a really unique dish for your Thanksgiving dinners this week.


Carrot Parsnip Gnocchi with Sage Brown Butter

Prep Time: 1 hour, 20 minutes

Cook Time: 5 minutes

Total Time: 1 hour, 25 minutes

Serving Size: 2-3 servings

adapted from The Food Matters Cookbook by Mark Bittman

Ingredients

  1. 1/2 pound carrots, peeled and cut into chunks
  2. 1/2 pound parsnips, peeled and cut into chunks
  3. 1/2 cup whole wheat flour
  4. 1/2 cup regular flour
  5. salt and pepper to taste
  6. pinch of nutmeg
  7. 2 tablespoons butter
  8. 1 tablespoon olive oil
  9. 2-3 sage leaves

Instructions

Place carrots and parsnips in just enough water to cover them and bring to boil. Add a pinch of salt. Boil until soft, about 45 minutes, then drain. Return carrots and parsnips to your pot and let them dry over the lowest possible heat for 10 minutes. Puree carrots in food processor or by hand (I used a potato masher and did this by hand) and add nutmeg, salt, and pepper to taste. Set aside to cool for a couple minutes. Boil a small salted pot of water (this will be used to test the dough).

Combine both flours in mixing bowl. Add carrots to mixing bowl and stir until just combined. Pinch off a piece of the dough and boil in your test pot it to make sure it holds its shape. If it falls apart add more flour to mixture, until gnocchi just holds together.

Turn dough onto floured surface and roll into 1/2-inch ropes. Cut rope into 1-inch pieces. Arrange gnocchi on a floured baking sheet then cover with a towel. Refrigerate for 20 minutes or up to 2 hours. (At this point the gnocchi can be frozen on the sheet pan, then transferred to a plastic bag for 3 months. Do not thaw before boiling.)

Bring a pot of salted water to a boil. Also heat oil, butter, and sage over medium low heat in a large skillet. Heat until sage begins to crackle and butter begins to lightly brown. If butter is browning a lot turn down the heat. Cook a few gnocchi at a time in boiling water, until 1 minute after they rise to the surface. Transfer cooked gnocchi to skillet with a slotted spoon and lightly toss to coat. Continue process until all gnocchi are covered in the sage brown butter sauce.

Serve immediately.

https://keelymarie.com/2012/11/19/carrot-parsnip-gnocchi-with-sage-brown-butter/


Head here to see what the rest of the members created this week.

This week I’m heading to Orlando then Ft. Myers for some family time. Happy Thanksgiving!


Follow my Facebook page by clicking below to to easily find new recipes or subscribe via email in the column on the right. 

Follow Me on Facebook

::: keelymarie :::


Thai Style Sweet Potato Corn Fritters

SweetPotatoCornFritters-7871

Oh how I’ve missed the Food Matters Project the last few weeks. My mom was in town from Tennessee for two weeks and we took advantage of our time together by going out to dinners, so I’ve had a little less time to cook. It was such a wonderful trip and I miss her insanely since we had so much time together.

If you are new to my site, once a week a group of fabulous bloggers cook their way through Mark Bittman’s The Food Matters Cookbook. We learn to cook and eat more fruits and vegetables, cutting down on animal products. It’s healthier for you and better for the environment to keep a diet consisting of a heavy hand of veggies and fruits and small dose of animal proteins.

The dishes we’ve cooked have opened my eyes to a world of cooking methods. It has been a great (almost) year! Check out my recipes page to see all my recipes inspired by the project.

These Thai Style Sweet Potato and Corn Fritters are freakin’ fantastic! I served these with a simple lemon, garlic, and paprika seasoned tilapia and chose to bake them rather than fry. Thanks to Aura for choosing the recipe this week.

Check out the project page to see what the members came up with this week, we don’t always stick true to the recipe so you can always find a version you like here! You can also become of fan of the Food Matters Project on facebook or follow our Pinterest board if you love what you see.

Thai Style Sweet Potato Corn Fritters

Prep Time: 20 minutes

Cook Time: 20 minutes

Total Time: 40 minutes

Yield: 12 fritters

recipe adapted from The Food MattersCookbook by Mark Bittman

Ingredients

  1. 1/4 cup lime juice
  2. 1 tablespoon nam pla (fish sauce) or soy sauce, or to taste*
  3. 1/2 teaspoon minced garlic
  4. Pinch of red chile flakes
  5. Pinch of sugar, optional**
  6. 2 cups grated sweet potato, squeezed dry (mine had a tond of liquid)
  7. 1 cup corn kernels
  8. 1 fresh hot chile (like Thai), minced
  9. 4 scallions, chopped
  10. 3 tablespoons chopped fresh cilantro
  11. 1 egg or 2 egg whites, lightly beaten
  12. 1/3 cup whole wheat or all-purpose flour
  13. Salt and black pepper
  14. Vegetable oil, for frying or greasing the baking sheet

Instructions

Combine the lime juice, fish sauce, garlic, ginger, chile flakes, and sugar if you’re using it in a small bowl with 1 tablespoon water. Set aside, this is your dipping sauce.

Fried:

Heat the oven to 275° F. Put the sweet potato, corn, chile, scallions, cilantro, egg, and flour in a bowl and mix well; sprinkle with salt and pepper. (You can do this ahead of time and refrigerate the batter for a couple of hours before cooking.)

Put about 1/8 inch oil in a large skillet over medium-high heat. When it’s hot, drop spoonfuls of the sweet potato mixture into the oil and spread them out a bit. (Work in batches to prevent overcrowding and transfer the finished fritters to the oven until all are finished.) Cook, turning once, until golden on both sides and cooked through, about 5 minutes. Serve hot or at room temperature with the dipping sauce.

Baked:

Heat the oven to 400° F. Greased a baking sheet well with vegetable oil. Place golf ball sized balls of batter onto the baking sheet. Bake for 18-20 minutes. Serve hot or at room temperature with the dipping sauce.

Fancier Fritters:

When dropped fritters aren’t quite elegant enough for the occasion, you can dust your hands with flour and shape the fritter batter into small patties, cylinders, or other shapes. Cook immediately or refrigerate, loosely covered, for up to a couple hours before cooking. To make croquettes–which are essentially breaded fritters–set up 3 bowls: one with flour, one with an egg beaten with a splash of milk, and another with bread crumbs (preferably made from whole grain bread). Carefully dredge each shaped fritter in the flour, then the egg mixture, and finally the bread crumbs. Fry until crisp and golden.

https://keelymarie.com/2012/11/14/thai-style-sweet-potato-corn-fritters/


Like this post? Don’t forget to like my facebook page below to stay updated weekly!

Follow Me on Facebook

::: keelymarie :::


Homemade Naan

Homemade Naan

There are a few types of dough making that I don’t consider “baking”, they are just so simple and 100% precise ratios don’t matter as much. Pizza dough, steamed buns, and now…naan. I promise, any one of you can make naan at home and they are cheaper than store-bought.

You really can’t even begin to compare store-bought naan with homemade. The flavor is so much more intense eating them straight off the skillet. I suggest cooking these addicting flat breads with this Tandoori chicken or Murgh Makhani (Butter Chicken) and this Chana Masala (chickpea dish). A gourmet Indian feast that will wildly impress your guests or make you really happy you skipped out on that dry, cold delivery.


Happy Halloween everyone!

We celebrated Saturday night in Miami at a Veuve Clicquot party at the Four Seasons.

Lots of champagne = great night.

Homemade Naan

Prep Time: 3 hours

Cook Time: 20 minutes

recipe adapted from userealbutter.com

Ingredients

  1. 1 envelope or 2 1/2 tsps dry active yeast
  2. 2 tbsp sugar
  3. 4 1/2 to 5 cups all-purpose flour, more for dusting and rolling
  4. 2 tsps salt
  5. 1 tsp baking powder
  6. 2 cloves garlic, minced
  7. 3 tbsp milk
  8. 2 tbsp plain Greek yogurt
  9. 1 large egg, lightly beaten
  10. 2 tbsp vegetable oil, more for the bowl
  11. 3 tbsps ghee (Indian-style clarified butter) or melted unsalted butter

Instructions

In a small bowl combine sugar, yeast, and 1/4 cup warm water and let sit 5 minutes or until it becomes foamy. In a stand mixer combine the flour, salt, and baking powder with the dough hook and blend. You could also use a food processor with the dough blade.

Pour the yeast mixture, garlic, milk, yogurt, egg, 2 tablepoons of vegetable oil, and 3/4 cup warm water into the bowl and knead until the dough forms a ball that is smooth and elastic. About 5-8 minutes in a stand mixer, less by processor, and more by hand. The dough should be soft without being sticky. If it’s sticky, add more flour.

Put the dough in a lightly-oiled large bowl. Turn the dough around to coat oil on all sides and then cover the bowl with plastic wrap and let it sit in a warm, draft-free place for 60 to 90 minutes. In my house the oven is the only place for this with a towel over it. Punch down the dough and cut it into 8-10 pieces. Roll the pieces into balls and set on a floured baking sheet. Cover with damp kitchen towl and let rise again, until doubled in size (about 40 to 60 minutes).

Melt a little butter on a hot skillet. You are going to use the 3 tablespoons to cook all 8-10 pieces of naan. Just cut a little piece off and throw it in the pan in between cooking each piece of naan. With your hands, flatten each piece of naan into a flat oval like shape. (I flattened one piece each time another piece was cooking)

Brush the naan with water and place it water-side down in the skillet. Cook for about a minute. Large bubbles should begin to pop up on the surface. Brush the top of the naan with water and flip it over for another minute or so. Place in a basket covered with a napkin or towel to keep warm. Optional: brush with more butter or ghee and/or garlic. I did not as they were already covered in butter from the pan. Repeat until you have 8-10 naan adding more butter to the pan as needed between cooking.

Notes

Just like pancakes, it can be hard to tell if the temperature of the pan is right. Test it out with your first piece, the naan should be covered in dark brown spots but not quite burn. Adjust the temperature of the skillet/pan as needed.

You can freeze or refrigerate the dough balls for future use as well. Just make sure they come to room temperature again before cooking.

https://keelymarie.com/2012/10/31/homemade-naan/


Like this post? Don’t forget to like my facebook page below to stay updated!

Follow Me on Facebook

::: keelymarie :::